Friday, March 29, 2013

Geliciously Happy!

Last night, I held my first Gelicious Printmaking workshop at the Art Coop at 425 Market Place Antiques. It was so much fun. I had seven students, including friends, their friends, and (drumroll please) my Delta Zeta sorority sister, Christy. We last saw each other in 1992 when we both graduated from the University of Illinois. She lives in New York, but was in town visiting her sister and she heard about my workshop through Facebook. (Even though FB drives me crazy at times, it does have its moments!)

Here we are doing our cheesiest sorority girl pose.

I couldn't have asked for a sweeter and more fun group of students. I only had to do a few quick demos on the Gelli printing plate and they were all grabbing paints, experimenting with pattern tools, and rolling those brayers like the wind.


What a great way to end the week, making art with friends. I feel so grateful. 
Next week is our Spring Break. I think I will do just that, take a break. My plans? Read, have a glass of wine (or two), and simply breathe in the people I love.  


Tuesday, March 26, 2013

How To: Rice Paper Flags


In a few days, I will be holding my first Gelli printmaking workshop. I'm calling it Gelicious because, as most of you know, Gelli printing is truly a delicious activity! One of our activities will be to make a fun little flag banner using rice paper. I've already sewn a little packet of flags for each student.


Here's the how-to if you'd like to give it a try at home. (Of course, I'd much rather show you in person!)

Supplies you'll need:

  • Rice paper (you can buy it in rolls at Hobby Lobby)
  • Sewing machine
  • Gelli printing plate 
  • Acrylic paints
  • Stamps
  • Ink
  • Glue Stick
  • Scissors
  • Twine or other stiff ribbon
Step 1:  Cut a sheet of rice paper about a yard long (you can adjust this depending upon how many flags you'd like to make.)

Step 2:  Cut the long sheet in half lengthwise. Don't worry if it is not perfect. (As you can see from my cut, I'm an eye-baller, no ruler necessary!)


Step 3: Fold over about one inch along the long edge of the sheet.


Step 4:  Sew the flap down staying close to raw edge. You want to create a pocket about 1/2 inch deep.


Step 5:  Cut the long sheet into rectangles. Don't worry about cutting through the seams.


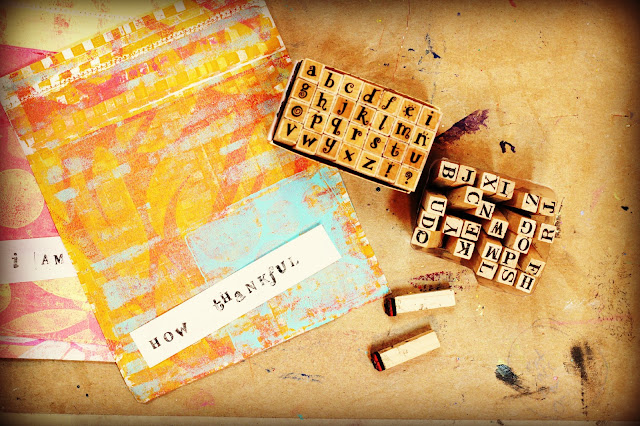
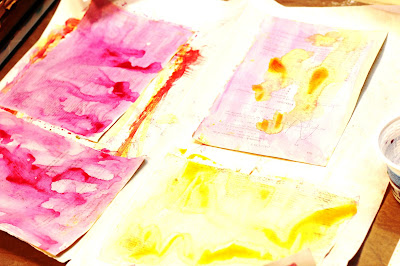
Step 6: Use your Gelli plate to create some beautiful prints. Then choose a phrase and stamp it out onto small strips of rice paper.


Step 7: Glue the message onto each flag with a glue stick.


Step 8: String it up!


Once I finished the flag banner, I decided to go back and trim the bottom edges to create fun accents.


My message to my students and to you, my bloggy friends:

How thankful I am we are here together!

Monday, March 25, 2013

Top 10 Studio Favorites

Need a little mix up in your creative life? Try playing around with your studio top ten. Pick ten of your favorite supplies. Pick a crafty book that makes you happy. Use the book to inspire some new art using your top ten supplies.

My inspiration book: Painted Pages, by Sarah Ahearn Bellemare. I have blogged about this book before, but I can't help it... I just love it. Perhaps it is spring's refusal to start around here, but Sarah's sunny and delicate style looked so enticing. She uses a lot of white and pastel colors to create such dreamy images. I decided to use my supplies to work toward this warmth.


My Top Ten Supplies:


1) Acrylic paints
2) Gouache paints
3) Pan pastels
4) Stencils
5) Carved stamps
6) StazOn ink
7) Caran d'ache water soluble wax pastels
8) Deli paper
9) Graphite pencil
10) Painted papers to collage (using matte gel medium)

I started by cutting 4 pieces of watercolor paper and tracing a 5" x 7" rectangle on each. I started each piece with an outline of acrylic color. Turquoise is my new favorite color.


I kept layering paint, pencil, pastels, stencils, stamps and collage to create these summery pieces.


It was fun working with the same set of supplies to create four different pieces. I tried to use a lot of the same colors, images and marks, just moving the composition around as I worked. I'm not sure what I will do with these pieces, but it was a great exercise and a fun way to push myself in a different direction - always a good thing creatively.

I enjoyed this exercise so much, I might make it a regular practice. How about you? Do you have a regular practice that moves you into a new direction creatively?

Saturday, March 23, 2013

What I'm Learning About Dream Chasing


A little over two years ago, I made a decision that changed my life. It was my 40th birthday. I decided to give this art thing a go. No more excuses (and I had a long list of very good ones that had worked for over 20 years.)

This is the first picture I put on this blog. The paper from a 40th birthday present.
I started blogging and trying all kinds of new things to get involved in any kind of art world that might welcome me. I soon found all kinds of supportive voices from all over the world. It was quite a magical feeling, a sense that the world was saying, "Where have you been, girl? We've been waiting for you."


As many of you know, I will be teaching at the CREATE mixed media retreat in the Chicago area this fall. This afternoon I was taking a look at the CREATE mixed media retreat website. I saw my picture there and  thought, "I cannot believe I am really getting to do this!"

These two years have been wonderfully encouraging and I've had so many surprising successes along the way. But along with the creative highs, there have been some painful moments of rejection too. I still struggle regularly with so many creative cringes, wrong turns, humbling moments, and doubtful days when I eat too many cookies and wander in a forlorn funk. It can get downright ugly.

But overall, I am on the path I have longed for all my life. I was just too scared to get on it. I don't know what my future holds or if success will be a part of it. I also don't know if I will always have the opportunity to pursue this life. But I've decided...while I do, I will do it with all my might. For the first time in my life, what I want is not coming quickly or easily. I'm finally chasing a dream.

Here are some of the biggest things I've learned about dream chasing so far.

1) I Must Fight the Urge to Give Up EVERY SINGLE DAY
I used to think that people who talked about never giving up on their dreams were just lucky people. Now I know that all this talk about "never giving up" is a result of the constant temptation to do just that. Every day, I flirt with the idea of just giving up. On rough days, I fantasize about bagging up all my supplies and donating them. On really bad days, I dream about an enormous art bonfire on my parents' farm. See... I told you it was ugly.  

2) Going After Your Dreams Will Put You Face to Face with Your Ugly Self
I hate to admit this, but earlier in my life I was quite critical. I didn't give much respect to vendors I saw at a craft show (unless I liked their stuff), artists that expressed themselves in unusual ways, or new artists who hadn't quite perfected their skills. Going after your dreams means exposing your most vulnerable self. I've never felt so humiliated, hurt, and embarrassed in my life. Seeing shoppers pick through and make rude comments about my wares at a craft show, not being selected for inclusion in a contest, and having to remind a gallery owner of my name (when my art is hanging on the wall), well...hello humble pie. This bit of knowledge leads to discovery number 3.

3) Being a Dream Chaser Makes You a Kinder Person
Now that I've had a taste of dream chasing, I have so much respect and flat-out love for the dreamers in this world. My heart has changed. I see those kooky mimes in a whole new light.

4) Dream Chasing Leads to More Dream Chasing
It's like riding a bicycle. Once you get the hang of it, you want to keep riding. You fall off the bike, get your skirt wound up in the chain, and flip over the handle bars every now and then. But the feel of wind in your hair brings you back.

How about you? Are you chasing a dream? What have you learned?


Friday, March 22, 2013

Make Art With a Friend

 
Yesterday was a treat. My friend, Crystal, came over to create a scrappy collage. She had watched my DVD and decided she wanted to give the process a whirl. It was so much fun to walk her through the process. She's a talented concept cake designer and can do amazing things with frosting, so I knew she'd have no problem experimenting and getting covered in paint and matte gel medium. I made my own collage as we walked through the steps. As usual, the end result looked nothing like what I had planned, but still made me very happy. 


Along the way, I was able to share some fun supplies with Crystal. She did not know about the wonders of embossing powder or carving rubber stamps. Of course, she looks at every technique and thinks, "How can I do this on a cake?" and "Could this be edible?" It is fun to see how her mind works.

 
We laughed at how differently we create. She is a planner and uses skills that require a high level of precision and dexterity. Her creations must be perfect. I am more of a sloppy, let's-see-what-happens-when-I-do-this kind of worker. At one point during the process, I like to semi-destroy the collage with a heavy sandpaper scrubbing.


This was a difficult moment for Crystal. I think I saw real pain in her face.

But she did it. She was determined to push herself out of her comfort zone. I assured her that I would have that same pained look if I was trying to create a perfect replica of a karate uniform out of cake (yes, she has done that.)

Throughout the day, we shared stories as they came to mind. I learned some amazing things about my so-called "mild mannered" friend. Art-making can be a little bit like wine-drinking. Some interesting tidbits come out.


The whole day left me feeling so thankful for the gift of artistic expression and a sweet friend who loves to create just as much as I do.

What did I learn from this experience? Find people who will create with you and make time to create together. If you don't have a crafty collaborator, offer to teach your craft to a friend. You never know how sharing your gift might impact your friend's life or your own. Making art is more than just paint and glue. There's a little bit of magic in it too.

Wednesday, March 20, 2013

Don't Question It


An old friend of mine did me a huge favor the other day. He sent me the quote I needed to hear. I believe he read it in a George Carlin book, but the quote is from modern dance legend, Martha Graham.

"There is a vitality, a life force, a quickening that is translated through you into action, and because there is only one of you in all time, this expression is unique. And if you block it, it will never exist through any other medium and be lost. The world will not have it. It is not your business to determine how good it is, nor how valuable it is, nor how it compares with other expressions. It is your business to keep it yours clearly and directly, to keep the channel open. You do not even have to believe in yourself or your work. You have to keep yourself open and aware directly to the urges that motivate you. Keep the channel open."


If I was ever going to get a full torso tattoo, this would have to be it. In fact, I think I would have it tattooed upside-down, so that I could look down and read it back to myself. Every single day.


Although every word of this message hits home for me, one sentence really stands out. "It is not your business to determine how good it is, nor how valuable it is, nor how it compares with other expressions." I like to imagine my mother saying this to me in what we always called her "white eye" voice. This meant that she was speaking quite sternly and her eyes were open widely, thus the "white eyes." We always heeded the message of the white eyes. She meant business when she used it. (And I am proud to say, I think I inherited the magic of the "white eyes." You can ask my kids about it.)


Somehow reading this quote makes me let out a huge sigh of relief.
I don't have to explain myself. To myself. Or anyone else.
I am not even allowed to question any of it.
My job is simply to be open and keep moving.
I can do that.


Tuesday, March 19, 2013

Another Paper to Hoard

My sweet friend, Tamara (aka "The Queen of Fun",) just returned from an amazing trip to Egypt. While she was there, she bought some papyrus and brought it all the way back just for me. She thought I'd have fun with it. I felt the love.

 
I really wanted to tuck my special paper away and save it for something amazing, but I also started thinking about all the fun things I could try with it. I definitely want to paint something on a good-sized hunk of it, but I also wanted to cut some of it and experiment a little bit too. I started by testing it in a circle cutter.


It popped out into perfect discs.


Next, I tried some Gelli printmaking. I just used craft acrylics and a foam stamp to create a layered design. The paint did not pick up in all areas, but I liked the worn look anyway. I wonder if a thicker layer of paint might work better... next time.


Finally, I decided to see how well it would work in my sewing machine. It sewed beautifully. I made a small garland and thought about how beautiful a big garland would be hanging in a sunny window.


For now, I am not ready to cut into any more of my prized papyrus. I wonder how long I will hoard the rest of it. About a month ago, I found a piece of lacy purple paper that I bought in 1992. I remember this because I was still in college when I bought it! I was amazed that I had hoarded it for the last 20 years. I finally tore into it and put it into a collage. It felt good. Enjoying hoarded art supplies feels a bit like having a glass of the wine you've been saving for a special occasion. You enjoy it, but you kinda wonder... why didn't I do this sooner?


Friday, March 15, 2013

Painting My Heart

Suddenly I am the mother of a new child. One who is almost 13. One who is so very different from the little boy I knew only 6 months ago. And it is tearing me up inside. Suddenly motherhood is tricky again. I don't say the right things. Ice cream isn't the magic bullet it once was. I have become a bit of an embarrassment.

The last few years of golden happy moments of 8-11 years old... well, the magic is gone.

Everything is still very good. It is just so different. And so confusing.

So I am painting. And crying a little too. Happy for the great kid I've got, but sad for the little boy I will never get back. Oh, I know it is good for him to grow up and to pull away. But wow... this hurts.
So I am painting my heart and all the confusion, the mixture of emotions, and the sense of loss I feel.


I think I will keep painting it out. I need to get ready for child number 2. She's only one year younger, so she'll be tearing my heart out within the year.

I see a lot of paint in my future. And maybe another puppy.


Thursday, March 7, 2013

Stamp-Carving, Painting, & Book Binding, Oh My!


Do you ever wake up thinking, "today I must (insert craft or art project.)" The other day I woke up thinking about carving rubber stamps. As soon as I had a free moment, I started digging through my supplies to find my lino cutter and anything to carve. If you've never tried cutting your own stamps, you've got to give it a whirl. You only need a lino cutting set (I buy the cheap Speedball version) and a piece of rubber (you can even use pink school erasers.) I find the process to be extremely soothing. There is just something about the feel of cutting into the rubber and then seeing your idea stamped out in black ink. Like so many creative techniques... I don't know why, it just feels good.


I happened to have a few erasers and one block of pink rubber, so I sat down and let the carving begin. 

I started by making some facial feature stamps. I thought it might be nice to stamp out some faces. I drew each shape onto the rubber with a pencil, then carved out the negative spaces.


New nose and mouth choices...


It is fun to see how many expressions you can make with only a few facial feature stamps.


Next I moved into what I call free-style carving. I just started carving some marks in the rubber without thinking about the end design. Some lines turned into easy-to-recognize designs, while other lines turned into interesting abstract shapes.


I used the free-style set to make some new papers. I  started by coating old dictionary pages with gesso and a watery layer of acrylic paint.


 Once dry, I added a layer of deli paper to each side using matte liquid medium as the adhesive.


Next, I stamped away using Staz-on ink to prevent any kind of smudging or smearing. I coated the stamped layer with another layer of matte medium. 

 
I ended up having a lovely stack of papers. 


I decided to bind them together into a little book. I bound my book using the detailed method I learned through an online course called The Mixed Media Variety Hour through The Land of Lost Luggage with Julie Prichard. In Julie's lesson, she shows you how to create signatures (smaller bound booklets) that you sew together to create a fully bound book. I started by creating three signatures using about 6 papers each.


I then sewed the signatures together and bound the edge with a scrap from an old canvas painting disaster.


I made a few alterations with my version, mainly because I did not follow the instructions carefully (shocker.)
Now I want to make more books. The book-binding experience is actually much easier than I thought it would be. And even if you mess up a little... well, it is a "hand-bound" book, so the imperfections are somewhat endearing. 


Are you a stamp carver? What do you like to carve?